As promised, every Wednesday for the next few weeks or so, I will be bringing you all a little "Designing Your Own Blog 101". This week we're starting off with...dun, dun, dun...the header! Now, my reasoning behind putting this design series for you all was because blog design is SO crucial when it comes to blogging. SO crucial. In my book, it's one of THE most important things, if not the single most important thing, when it comes to blogging.
When I first started blogging I just had a really basic ghetto template from blogger. At the time, I was just studying plain old Advertising and hadn't made the switch over to graphic design so I had literally no knowledge of how to do anything with my blog design. I then got lucky and won a custom design after participating in a giveaway similar to the one I hosted a couple of weeks ago. The design was nice, and it worked for a little while, but then I decided I wanted to up my anti a bit. That's when I decided to actually hire someone to customize my blog. It wasn't a pleasant experience. I really wish I had done my research. I ended up paying a hefty price for something that I didn't love and for service that wasn't up to par with the price I was being charged. My emails would go unanswered for weeks and after I expressed some of the changes I wanted made (I was promised two revisions when I purchased the package) my emails just got completely ignored. My mistake was picking someone who was a newbie designer with no portfolio, and frankly, I only went with because I liked how she had done her own blog. My advice? Research, research, research. Before committing to any designer, check out their portfolio and/or get in touch with the bloggers they've designed for. Now, there's no point in naming names when it comes to my bad design experience. It would just be mean, and for all I know, she's improved. What I will do, though, before we get started on this, is mention a few designers that are reliable and talented. My first suggestion would be to buy a template rather than a custom design if you don't have the funds for a full blown custom design made just for you. Especially if you're new to blogging. I love, love, love, the template designs of Pink and Lola! They're chic, fun, AND, affordable! Check out Pink and Lola's shop here. Another fun shop for affordable blog templates? Lisa's Menagerie. Feminine and elegant! Check out the shop here. If you do want to take the plunge for a custom blog design, and not break the bank, I'd highly recommend Kalee, of Fredrongo.com! Her designs are so clean, airy, and fun with small pops of color! Not to mention that her prices for a custom blog design are unbeatable. Check out her work here! For those of you who would rather make updates to your blog for free and on your own, keep reading!

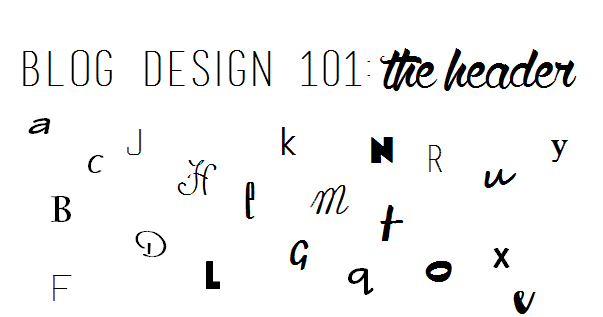
Well, now that we've gotten over that hump of a paragraph let's get started! Now, a lot of these methods I picked up in my design classes after I decided to switch from Advertising to Graphic Design. Well, that, and a ton of research on my own! Let's get started with this header now! The first thing we'll need to do is pick out a font. I like headers with a mix of fonts because they're more interesting to me and eye catching, however, one font can be just as fun too! I like to get my fonts from dafont.com They have all the kinds of fonts you could possibly desire. I like combinations of basic serif fonts and sans serif fonts with more curly cursive fonts. For the example I'm showing you today I'm going to be using "tall dark and handsome", "channel", and "wood cutter jet-set". To download a font from dafont.com all you need to do is hit the download button to the right, a dialogue box should then open up prompting you to either open or save the file. Open it. Next, it'll open up a folder with two files. Double click on the file that says "open type font file" to the right of it. That should open up another dialogue box with the option to "install" on the top left. Hit install and you're good to go!
Now that we've got our font/fonts all picked out, we need to get started on the real work. For this next step we have two options. We can either use actual design programs, like photoshop (or my personal favorite, illustrator), or we can use the good old and free option of "paint". Now, if you want to go the photoshop route you can download a 30 day free trial here, holla! Unfortunately, I won't really be able to guide you through that route because my subscription just ended and I'm still deciding whether or not I want to pay $20 a month for it for the rest of forever or just plain old shell out the nearly 2 grand for the entire creative suite. ;) For those reasons, today I'll be guiding you all through creating a header with the "paint" program that is basic to 90% of computers. Also, it's an easier option to guide beginners through. A lot less technical terms. :) If you feel confident enough to play around with photoshop, though, I'd highly recommend getting the free trial. The difference between work done in photoshop or just a regular paint program is NIGHT and DAY.
Ok, so open up whatever paint program you have available to you on your computer. The first thing you'll want to do is adjust the size of your canvas. I like to make mine 636 x 230. It's a good basic size.

Next, open up a text box and type in the title of your blog. Since I'm going with three different fonts, and I don't want them all the same size, or lined up perfectly straight, I'm going to make a text box for each phrase of my faux blog title, "The Princess and the Pea".
My first text box will be "The". I went with "tall dark and handsome" for this font, sized at 36.
My next text box will be for "Princess" I went with "channel" for this font, sized at 68. Now, I don't want it directly next to "the" so after I've typed it in I'm going to select it with the selection tool and move it just a little closer to "the" and slightly below it.
For my final text box for "and the Pea" I went with "wood cutter jet-set" sized at 36. After I typed it in I selected it and centered it directly below "princess".

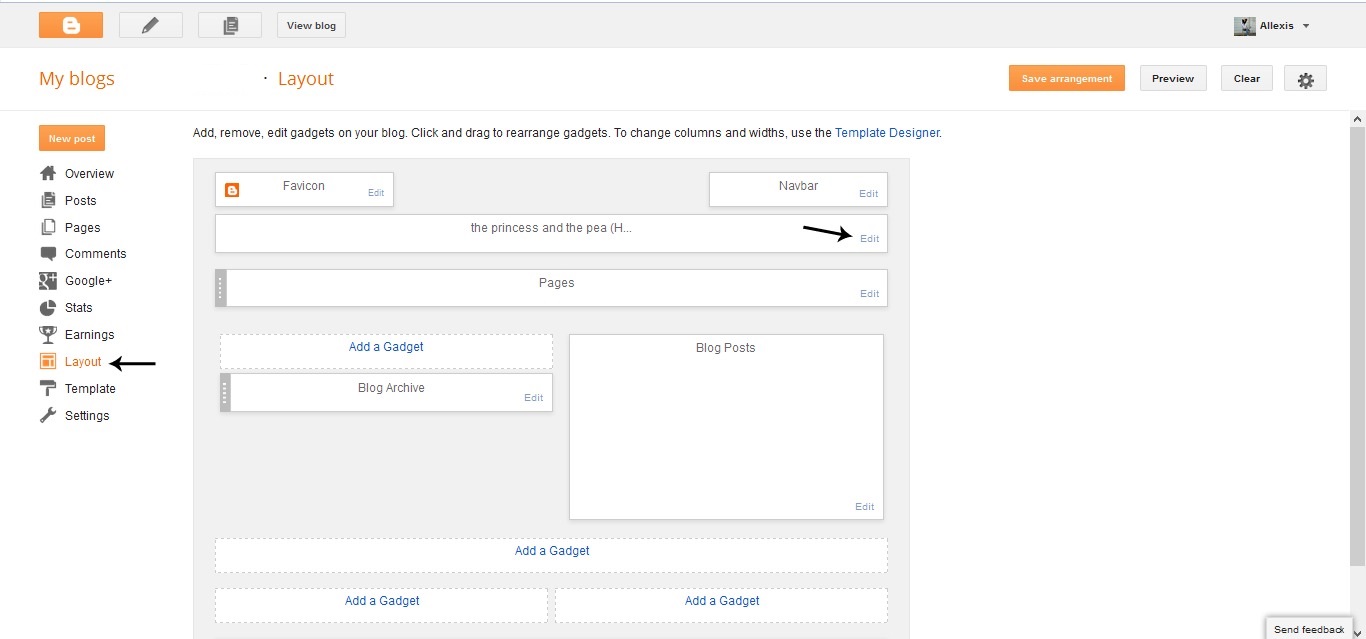
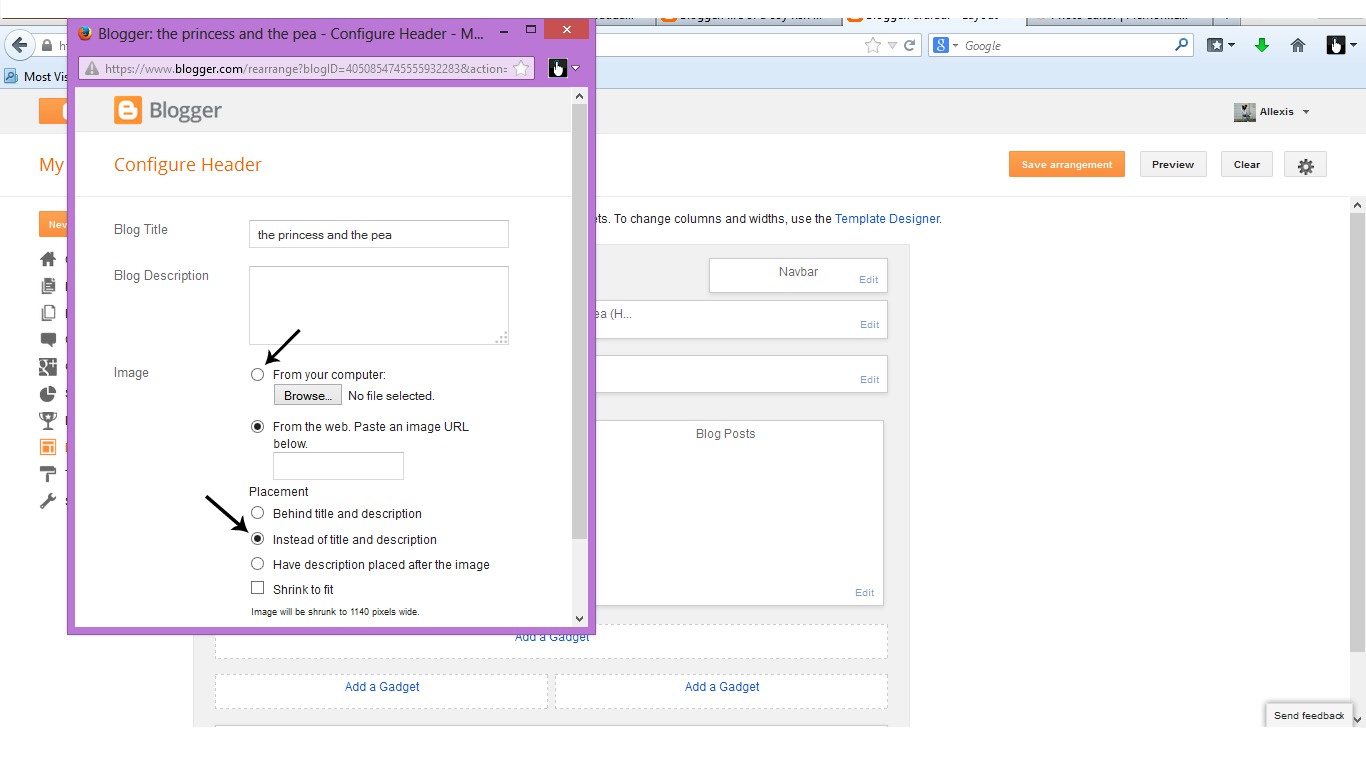
Now, that we've got our header designed and created we need to save it. When you save it be sure to save it as a PNG file rather than a JPEG. A PNG file will show up a lot clearer when we install it. To install it we'll need to log into blogger and head over to layout. Once we're in layout, hit the edit button on your header tab. A dialogue box with options will open up. Scroll to the section that reads image and select the option "from your computer" and click browse. Open up your header file and a small sample of it should now show up on your dialogue box. Before hitting the save button on the dialogue box select the option "instead of title and description" so that it'll show up on your page correctly.
There, now my header is installed. The thing is, though, it's off center. I don't want that. I want it to be centered on my page. To do that I need to go to the "template" page on blogger. Once there, I need to hit on the "customize" option. That will open up a whole new page of options. :) To center our header we need to click on the "advanced" tab. Once there, scroll down and select the "add CSS" option. Now, we'll need to type in the following code:
#header-inner img {margin: 0 auto !important;} #header-inner {text-align:center !important;}

Our header should now be centered. If it isn't showing up centered in the example box of your blog on the screen, just hit enter after typing in the code and that should do the trick. Before finishing up, we need to save our work. Click on the "apply to blog" button and you're safe to head back to blogger. After that, we've got a nice functioning header!

I hope this tutorial was helpful! Let me know if you have any questions and I'll do my best to give you an answer! Next week we'll be playing around with the "about me" section so stay tuned!
Much love!
Wow. Thanks for this tutorial! I just updated mine!
ReplyDeleteCan't wait to get updating my blog. U heard any reviews about etsy with regards to blog templates??xx
ReplyDelete